Home > How to Wallpaper > Preparing the Paper

info@wallpapercall.co.nzPhone. 09 8341256 |
Preparing the Paper
.jpg) For pre-pasted paper
For pre-pasted paper
A brief soaking in water is essential, to activate the paste that is on the back of the paper.
-
Fill the water trough with lukewarm water, and place it in the centre of the room, on a plastic drop-cloth or sheet.
-
Now, loosely re-roll the cut lengths of paper, from the bottom edge, with the pattern or texture on the inside. Place the first pre-rolled length in the water, make sure it is fully covered. Leave for about 15 seconds, then pass the top edge of the length under the water trough wire and slowly draw the paper out of the trough. Check that all the paste on the back of the paper is fully wet.
-
Lay the wet paper out flat on the plastic sheet, paste side up, then fold loosely – don’t crease – from the bottom edge up to one-third of the length, then fold the top down to overlap the first fold by 10mm. The larger fold should be at the top of that length.
-
Repeat this process for several lengths of cut paper.
-
Drain and leave the folded lengths for about 8-10 minutes. This allows the paper – and you – to relax before the next step – putting the paper on the wall.
.jpg) For Paste the Paper
For Paste the Paper
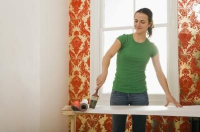
This is when a pasting table comes in very handy – you can hire one, or borrow one, or make do with the kitchen table – but cover it first. You will also need wallpaper paste and a pasting brush.
-
Mix the recommended paste according to the instructions on the label, to ensure you have the right consistency.

-
Place the cut lengths face down on the table. Make sure they are all laid out in the same direction – all tops together, and all bottom edges together.
-
Now, paste the back of the paper with paste/adhesive, applying it evenly in a herringbone pattern, pasting from the centre out to the edges. Make sure the edges are well-coated, and the paste is evenly applied over the full length of the paper.
-
Fold the ends towards the centre, with a smaller fold at the top. This will help you easily identify the hanging direction of the paper. Make sure not to crease the folds.
-
Leave each length to rest for between eight to ten minutes. Do not rush.
.jpg) For Paste the Wall
For Paste the Wall
Paste the wall products have a specially developed backing which does not expand, allowing it to be hung dry, without having to soak it in water, straight from the roll. You just ‘paint’ the adhesive/paste onto your properly prepared wall, not on to the paper.
-
Don’t paste the entire wall before starting to hang your wallpaper. Simply paste one section of the wall at a time so that the paste doesn’t dry out. Allow some overlap – paste a bit more of the wall than just the width of each cut piece.
-
Slide the paper into place and check the match. No need to rush. Smooth it across using a brush.
-
Then trim off to fit at the ceiling/top and skirting/bottom edge with a sharp trim knife.
